
How to Repot an Orchid with Air Roots? Step-by-Step Guide
Repotting an orchid with air roots can seem like a daunting task, but with the right knowledge and techniques, it can be easily done. Air roots are a unique feature of orchids and require special care when repotting.
The purpose of this article is to guide you through the process of repotting an orchid with air roots, including the tools you'll need and the best practices to ensure your orchid thrives in its new container.
No matter if you're a beginning or experienced orchid collector, this guide will help you repot an orchid with air roots effectively.
Let's take a look at how to repot an orchid with air roots in detail.
Understanding the Importance of Repotting an Orchid with Air Roots
Orchids are known for their exquisite beauty and unique charm, making them a popular choice among plant enthusiasts. These delicate flowers have a reputation for being finicky.
One aspect of orchid care that often goes overlooked is the importance of reporting, particularly when it comes to orchids with air roots. Let's discuss why it is necessary to repot an orchid with air roots.
What is Air Roots?
Firstly, let's understand what air roots are and why they are essential for orchids. Air roots, also known as aerial roots, are roots that grow above the ground or outside of the potting medium.
Unlike traditional roots that absorb water and nutrients from the soil, air roots serve a different purpose. They help the orchid cling to trees or other surfaces in their natural habitats and absorb moisture and nutrients from the air.
When to Repot an Orchid
When an orchid with air roots is confined to a small pot or has been in the same potting medium for an extended period, several issues can arise. Over time, the potting medium may break down, becoming compacted and hindering air circulation.
This can lead to poor drainage and cause the roots to suffocate, which ultimately affects the overall health of the orchid. Additionally, as the potting medium deteriorates, it may lose its ability to hold moisture, leading to inadequate hydration for the orchid.
Repotting is crucial to prevent the orchid from dying as it refreshes the medium, allowing for better air circulation and healthier root growth, ultimately preserving the orchid's vitality.
Repotting also helps identify and remove damaged or dead roots, preventing the spread of diseases and encouraging the growth of new ones. Additionally, repotting allows for adjusting the pot size to accommodate the orchid's growth, preventing overcrowding of roots and providing ample space for development.
On the other hand, if the orchid has several air roots and minimal traditional roots, an orchid planter with holes may be used to accommodate the plant's unique growth pattern. In the end, repotting an orchid with air roots is of utmost importance for maintaining its health and vitality.

How to Repot an Orchid with Air Roots?
Air roots, also known as aerial roots, are a unique characteristic of orchids. Unlike regular roots that grow in the soil, air roots attach themselves to surfaces such as tree bark or moss. These roots absorb moisture and nutrients from the air, providing additional support to the plant.
When it comes to repotting an orchid with air roots, a few extra steps need to be taken to ensure the process goes smoothly. Here's a step-by-step guide to help you when to repot orchids.
1. Prepare the Necessary Materials
You will need a new pot, a fresh potting medium suitable for orchids, a sharp and clean pair of scissors, and a spray bottle filled with water.
2. Choose the Right Planter for Repotting an Orchid
The size of the pot you choose is crucial for your orchid's well-being and growth. A small pot hinders root development, leading to stunted growth and various issues.
Cramped and tangled roots struggle to absorb water and nutrients, resulting in inadequate nutrition and poor thriving. Conversely, a large pot can hinder root health by blocking light and air circulation. Gradually increasing pot size during repotting ensures sufficient space for root growth.

For most orchids, pots that measure between 4-6 inches in diameter are suitable. However, as orchids mature, some older specimens may require even larger pots to accommodate their growing needs.
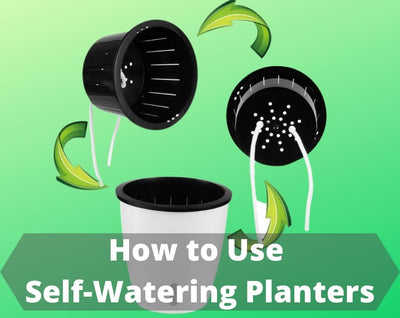
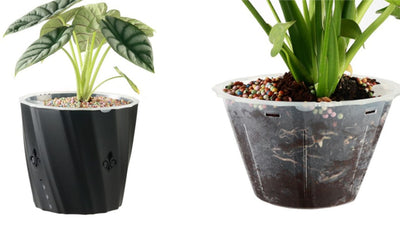
To prevent waterlogging, ensure the pot has adequate drainage holes. Self-watering planters with air holes are the best option. A wide range of self-watering planter can be found on Planterhoma.
3. What Soil to Use for Repotting Orchids
When potting orchids, it's crucial to use the correct orchid potting mix. Instead of regular soil, opt for a specialized commercial potting mix designed for orchids. These mixes meet orchids' specific needs and create an ideal growing environment.
Good orchid potting mixes offer proper drainage and air circulation, preventing root rot in orchid and other issues caused by waterlogged soil. They are light and airy, allowing for optimal oxygen access and preventing suffocation. If you prefer making your own mix, consider combining sphagnum moss and bark in a 1:5 ratio or using charcoal and sponge rock instead of moss.
Regardless of which option you choose, ensure the mix is light, well-drained, and promotes good air circulation, leca balls is also a good option for ochids. Repot your orchids every year or two to prevent mix breakdown and compaction, ensuring they thrive in their pots.
4. Gently Remove the Orchid from Its Current Pot
Carefully remove the orchid from its pot, either by tilting the container or turning it upside down. Handle the plant gently due to its delicate nature.

5. Inspect the Roots
Take a close look at the roots and remove any dead or decaying roots. Healthy roots are usually green or white, while dead roots appear brown or black. Trim any damaged roots using the scissors, ensuring to make clean cuts.

6. Place the Orchid in the New Pot
After trimming and cleaning the roots, it is time to transfer the orchid to a new pot. Place the orchid correctly in the new pot and carefully fill the pot with a well-draining potting medium around the roots.

Ensure that the medium allows for good airflow to the roots, but avoid compacting it too tightly. This will help the orchid to thrive. Allow the orchid some time to adjust and avoid excessive watering to prevent root rot. Monitor the moisture levels in the medium to maintain a healthy environment for the orchid.
Care After Repotting Orchids
After repotting your beloved orchids, it's important to provide them with the proper care to ensure their continued health and vitality. To ensure the successful growth of your orchids, it is crucial to provide them with the right conditions. After repotting your orchids, it is recommended to avoid watering them for about a week.
Temperature and Humidity Considerations
Orchids are tropical plants that thrive in specific temperature and humidity conditions. After repotting, it is crucial to maintain the right temperature and humidity levels to help your orchids recover and adjust to their new environment.
During the day, orchids prefer temperatures of 75 °F or higher, and at night, they prefer temperatures of 65 °F or higher. Make sure they receive twelve hours of indirect sunlight per day and maintain a humidity level of around 40% to promote recovery. When it finally comes time to water your orchids, it is important to ensure that the soil receives enough moisture.
Providing Adequate Light
Light is essential to the growth and blooming of orchids. After repotting, place your orchid in a location with bright, indirect light. Make sure your stems are protected from direct sunlight.
If you notice the roots turning yellow or brown, it may be an indication that the orchid is receiving too much light.
Fertilizing Post-Repotting
After repotting, give your orchid some time to adjust before resuming regular fertilization. Wait at least two months before applying any fertilizer. Freshly potted or repotted plants do not require fertilizer as their new potting mix already contains unused nutrients.
When you do start fertilizing, consider using a balanced orchid fertilizer diluted to half strength, or you can even explore the option of using a home fertilizer solution for orchids. Apply the chosen fertilizer every two to four weeks during the growing season. Repotting an orchid with air roots may seem a bit more challenging, but with proper guidance and care, you can successfully give your orchid a fresh start.
Common Mistakes to Avoid After Repotting
Repotting orchids is an essential task for any orchid enthusiast, as it helps promote healthy growth and prevents issues such as root rot. However, it's crucial to know what to do after repotting to ensure your orchids thrive. Here are some common mistakes to avoid when repotting orchids so you can give your plants the best possible care. If your plant is dying after repotting, it's important to assess the situation promptly and take appropriate measures to address any issues that may be affecting its health.
Overwatering: One of the most common mistakes people make after repotting orchids is overwatering. While it's important to water your newly repotted orchids, you must be cautious not to overdo it. There are many fungal diseases, and root rot can occur due to overwatering.
Exposing to Direct Sunlight: After repotting, your orchids may experience some stress as their environment changes. Exposing them to direct sunlight during this time can cause harm.
Place your repotted orchids in a location with bright, indirect light. This will provide them with the necessary light without the risk of sun damage.
Fertilizing Too Soon: While fertilizing is an essential part of Phalaenopsis orchid care, it's crucial to give your orchids some time to recover after repotting before introducing fertilizers. Fertilizing too soon can cause root burn and hinder the plant's ability to establish new roots.
In short, repotting orchids is a crucial step in their care, but it's equally important to avoid common mistakes afterward.
Final Thoughts
Repotting an orchid with air roots is a straightforward process that can greatly benefit the health and growth of the plant. By carefully removing the orchid from its old pot, trimming any damaged or overgrown roots, and providing it with fresh potting material, you can ensure that the orchid has the best conditions to thrive.
Furthermore, by taking the time to understand the specific needs of your orchid species and providing proper care after repotting, you can enjoy beautiful blooms and a healthy plant for years to come. Remember, patience and attention to detail are key when repotting an orchid with air roots, so take your time and enjoy the rewarding process of nurturing these stunning plants.
FAQs
Is It OK to Cut Air Roots Off Orchids?
Air roots, also known as aerial roots, are common in orchids and serve to absorb moisture and nutrients from the air. However, if these roots become long, tangled, or unsightly, they can be trimmed without harming the orchid. It is important to use sterilized tools to prevent the spread of any potential diseases.
What is the Best Thing to Repot Orchids in?
Orchids are best repotted in a well-draining potting mix that allows air circulation around their roots. It is important to avoid using regular potting soil, as it tends to hold too much water and can lead to root rot.
What to Do with Orchid Air Roots
Orchid air roots are a natural part of the plant's growth and serve important functions. It's best to leave them be unless they become damaged or diseased. If they are healthy, they help absorb moisture and nutrients from the air.
If they are growing outside the pot, you can gently tuck them back into the potting medium. However, avoid cutting or removing them as it can harm the plant.
How Do You Repot an Orchid Indoors?
To repot an orchid indoors, follow these steps. The first step is to choose a pot that is slightly bigger than the one you are using now. Next, remove the orchid carefully from its current pot, being gentle with the roots.
Trim any dead or damaged roots, and place the orchid in the new pot, making sure it is centered. Fill the pot with fresh orchid potting mix, ensuring that the roots are covered but not buried.
Finally, water the orchid thoroughly and place it in a well-lit area, avoiding direct sunlight. Ensure to regularly check the moisture levels and make necessary adjustments to the watering routine.
Read More


Leave a comment