
How to Fix Orchid Root Rot?
Orchids are known for their beauty and elegance, but they can be quite a challenge to care for. One common issue that orchid owners face is root rot.
Root rot occurs when the roots of the orchid become damaged and start to rot, leading to a decline in the overall health of the plant. However, with proper knowledge and care of orchid, root rot can be fixed and prevented.
Throughout this article, we will examine the causes of root rot and provide step-by-step instructions on how to fix orchid root rot if it occurs and save your beloved plant from rot.
Identifying the Causes of Orchid Root Rot
Among the challenges that orchid enthusiasts frequently encounter, one prevalent issue is orchid root rot. This occurs when the plant's roots are infected with fungi or bacteria, causing their decay and ultimately resulting in the demise of the orchid.

In this discussion, we'll delve into the causes of orchid root rot and provide insights on revitalizing dying orchid plant roots.
- Overwatered orchid root rot: One of the most common causes of orchid root rot is overwatering. Orchids are epiphytic plants, meaning they naturally grow on trees and absorb moisture from the air.
When potted, they require a well-draining medium that allows excess water to escape. Overwatering can lead to the roots sitting in stagnant water, creating the perfect environment for fungi and bacteria to thrive.
To identify overwatering as the cause of root rot, check the color and texture of the roots. Healthy orchid roots are usually white or light green and firm to the touch. If you notice that the roots have orchid roots turning brown, mushy, or have a foul smell, it is likely due to overwatering.
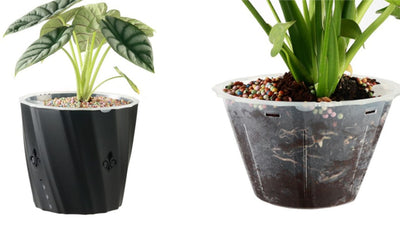
To treat overwatering-induced root rot, it is crucial to adjust your watering routine. You can use a Orchid self-watering planter for your orchid.

- Poor Drainage: Inadequate drainage can also contribute to orchid root rot. If the potting mix retains too much moisture, it can suffocate the roots and promote the growth of harmful microorganisms.
It is essential to choose a suitable potting mix that allows excess water to flow freely. Ensure that the orchid is potted in a well-draining potting. To determine if poor drainage is the culprit, examine the roots and the potting mix.
If the roots appear healthy, but the potting mix is excessively wet or has a moldy odor, it is likely that poor drainage is causing the root rot. To remedy poor drainage, repot the orchid using a well-draining potting mix specifically formulated for orchids.
- Fungal and Bacterial Infections: Orchids are susceptible to various fungal and bacterial infections that can lead to root rot.
These pathogens can be introduced through contaminated water, infected plants, or unsanitary gardening practices.

To identify a fungal or bacterial infection, look for signs such as orchid black roots spots or lesions on the roots, yellowing or droopy leaves, or a foul smell emanating from the potting mix.
Treating fungal or bacterial infections requires the use of appropriate fungicides or bactericides. Choosing the right orchid root rot treatment requires guidance from a professional or a knowledgeable orchid enthusiast.
- Improper Potting Medium: Orchids require a specific type of potting medium that provides adequate aeration and drainage. Using the wrong potting mix, such as one that retains too much moisture or lacks proper aeration, can lead to root rot. It is essential to use a well-draining medium specifically designed for orchids.
- Poor Air Circulation: Orchids thrive in environments with good air circulation. Stagnant air can create a humid and damp environment, ideal for the growth of pathogens that cause root rot. Lack of air movement can also prevent the roots from drying out properly after watering, further exacerbating the problem.
Ultimately, identifying the causes of orchid root rot is essential for effective treatment and prevention. By understanding the role of factors such as overwatering, poor drainage, and fungal and bacterial infections, you can take the necessary steps to maintain the health and vitality of your orchids.
Steps to Fix Orchid Root Rot
like any other plant, orchids are susceptible to certain diseases, one of which is root rot. Root rot can be a serious issue and can cause permanent damage to the orchid if left ignored. This part will guide you through the steps to fix orchid root rot and help your beloved flowers thrive once again.

Step 1: Identify the Orchid Root Rot Symptoms
Root rot can be fixed by identifying the problem first. Look for signs such as yellowing leaves, wilting, and a foul smell coming from the roots. Healthy orchid roots are firm and white, while unhealthy orchid roots are brown, mushy, and may have a slimy texture.
Step 2: Remove the Orchid from its Pot
Once you have identified the presence of root rot, gently remove the orchid from its pot. It is important not to damage the healthy roots during this process. Gently shake off any loose orchid soil or moss from the roots.
Step 3: Trim the Affected Roots
Using a clean pair of scissors or pruning shears, carefully trim away the affected roots. Cut until you reach healthy, firm tissue. It's essential to remove all the rotted parts to prevent the spread of infection. Make sure to clean the cutting tools with rubbing alcohol before and after each cut to prevent the spread of any potential diseases.
Step 4: Clean the Roots
After trimming the affected roots, it's time to clean the remaining healthy roots. Rinse them under slightly warm water to remove any debris or residual rot. Be gentle while rinsing to avoid causing any damage to the delicate roots.
Step 5: Apply a Fungicide
To prevent further infection and promote healing, apply a fungicide specifically formulated for orchids. Follow the instructions on the product carefully, ensuring that all the roots are treated. This step will help kill any remaining fungal spores and protect the healthy roots from future infections.
Step 6: Repot the Orchid
Now that the roots are clean and treated, it's time to repot the orchid carefully. Choose a clean pot with good drainage, as excessive moisture can contribute to root rot. Use a orchid pot with holes since these pots are designed for orchid plants to be healthy.
Fill the pot with a well-draining orchid mix. Gently place the orchid in the pot and fill the remaining space with the orchid mix, ensuring that the roots are adequately covered.

Step 7: Adjust Watering and Humidity
Proper watering and humidity levels are crucial for preventing root rot. Orchids prefer a balance of moisture and drying-out periods. Water your orchid when the top inch of the potting mix feels dry. Avoid overwatering, as it can lead to root rot.
Step 8: Provide Adequate Light and Air Circulation
Orchids thrive in bright, indirect light. Place your orchid in a location where it can receive the right amount of light without direct sunlight, as it can scorch the leaves.
Additionally, ensure there is proper air circulation around the plant. Good airflow helps prevent excess moisture buildup and reduces the risk of fungal infections.
Step 9: Monitor and Adjust
Monitor your orchid closely after treating root rot. Observe the plant for any signs of improvement or recurrence of the problem. Make adjustments to your care routine as necessary, such as adjusting the watering frequency or light exposure, to ensure optimal conditions for your orchid's growth.
By following these steps to fix orchid root rot, you can give your beloved plants a fighting chance to recover and thrive. Remember, prevention is always better than cure.
Final Thoughts
addressing orchid root rot requires a proactive approach and careful attention to the plant's specific needs. By following the steps outlined in this guide, including proper watering techniques, providing adequate air circulation, and employing appropriate treatment methods, you can effectively combat root rot and help your orchids thrive.
Remember to regularly monitor your plants for any signs of distress and make adjustments as needed. With patience and diligence, you can successfully restore the health and vitality of your orchids.
FAQs
Can Orchids Recover from Root Rot?
Orchids have the potential to recover from root rot if the condition is diagnosed and treated early on. By removing the infected roots, providing proper drainage, and adjusting watering practices, orchids can regain their health and thrive.
How Do You Get Rid of Root Rot on Orchids?
To effectively get rid of root rot on orchids, it is crucial to address the underlying cause of the problem. To get rid of root rot on orchids, start by removing the affected plant from its pot and gently wash away any remaining soil.
Trim away any mushy or blackened roots using sterilized scissors. Proper drainage, appropriate watering techniques, and using well-draining potting media can help prevent and treat root rot.
Regularly inspecting and removing affected roots, along with applying fungicides or natural remedies, can aid in the recovery and overall health of the orchids.
How to Tell if Orchid Roots Are Dead
To determine if orchid roots are dead, examine their color and texture. Healthy roots are firm and white or green, while dead roots are soft, mushy, and brown or black.
Additionally, check for any foul odor or lack of new growth, as these are signs of root death. Remember to provide proper care and adjust watering accordingly to maintain the health of your orchid's roots.
What Do Dead or Rotting Orchid Roots Look Like?
Dead or rotting orchid roots typically appear brown or black and maybe mushy or soft to the touch. They may also have a foul odor.
What to Use to Disinfect Orchid Roots
To disinfect orchid roots, you can use a diluted solution of hydrogen peroxide. Mix hydrogen peroxide with water and soak the roots in this solution for about a few minutes. This will help kill any bacteria or fungi present on the roots and promote healthier growth.
Read More


Leave a comment