
Repotting Monstera Deliciosa : The Complete Repotting Guide
Repotting Monstera is a common task every novice or experienced gardener will face at least. Repotting is an essential part of your monstera plant care cycle. Repotting is essential for every plant, but if you follow these simple steps, you can easily your plants without harming them.
Repotting (also called root pruning) can be tricky, but once you learn how to do it, you can save your monstera from dying from overgrown roots.
However, several factors can make Repotting monsters particularly challenging. The plants are usually climbing plants that aren't rooted and can have mossy poles to climb with. This can pose a problem when changing pots, making it difficult to handle the plant in the first place.
In this post, we will provide you some tips on how to Repotting monstera. Let's start talking in detail.
Read More:
Why is My Plant Dying After Repotting (And How to Fix It)
Top 7 Indoor Plants That Grow in Water Only Without Soil
Self Watering Pots Pros and Cons
How to Repot a Monstera Deliciosa?

Repotting Monstera deliciosa is an important part of caring for your plant. It helps to keep your plant healthy and happy. Following these steps will ensure that your plant has an easier time adapting to its new home and reduce the possibility of transplant shock.
The Preparation of a New Vessel
To ensure the success of your Repotting project, ensure that you have everything you will need before starting. In addition to clean shears, a moss pole (if needed), as well as pots, you'll also need these items.
Both the soil and the pot should be drained properly to allow for good water retention. You will need to place fresh soil inside the pot so that about one-third of its depth is filled with fresh soil before you can plant it.
Dispose of The Old Monstera Vessel
Please take care not to disturb your Monstera roots when removing them from its old grow pot by gently removing them cautiously. In order to ease the process of removing the aerial roots, some people cut the roots because of root rot in monstera.
The longer ones are probably best to bury in the new potting mix and to keep the shorter ones in the current potting mix. During our experiments, we found that it helped to reduce the effects of transplant shock in a significant way.
Place The Monstera in The New Vessel.
The Monstera should be placed in the new pot as soon as possible. It is important to ensure that the plant's root ball is several inches below the pot's rim and in the center of the pot. Fill the remainder of your pot with soil, and you will be able to plant your plant.
Moreover, it is important not to pack down the soil too much or press it down. There are a lot of benefits in loosely packing the soil for the Monstera roots to breathe much easier.
Make Sure to Water well.
You should give it plenty of water until the water drains out of the drainage holes. Tap water should not be used as it might contain chlorine, which could harm the plant if it is used. Alternatively, you can use filtered water instead of regular water.
When water is applied to your freshly re-potted Monstera, the soil will initially sink due to the water. It may be necessary to top dress the soil mix with more soil mix at this point.
For the next month or so, you should give your Monstera continuous attention and avoid fertilizing it regardless of whether it is suffering from transplant shock.
How to Repot an Orchid with Air Roots?
Repotting Monstera with Moss Pole
The Monstera will grow faster if you Repot Monstera with pole. This will support your Monstera as it grows. Whether you'd like to encourage your Monstera to develop leaf splits and fenestrations, or you have a monstera growing sideways and out of control, providing support is a great way to do this.

A moss pole can be added to your Monstera when you Repot your plant, which is the best way to do it. Extending the pole can penetrate fully into the pot without damaging any of the plant's roots.
It is extremely important to pick the right pot and pole when Repotting with a moss pole. Choose a moss pole whose height is suitable for your plant. Moss poles come in a variety of lengths. A pot's height plus the stem's height above the pot gives you the ideal length, with a little left over.
Adding moss poles to your plant may be as simple as taking out the first pole and adding a new one if it happens to outgrow the first one. It's important to keep a few things in mind when choosing where to place the pole in the pot.
First, place it near your Monstera's stem so it will be easy to tie. To make it more difficult for it to be seen, place it towards the rear of the pot, where the leaves will mostly hide it.
Read More:
Repotting Bird of Paradise (When and How To Repot)
Repotting Monstera in Winter
Your Monstera plant can be propagated at any time of year with cuttings. Be warned, however, that if you decide to propagate Monstera at this time of year, it may take a little bit longer.

Since the plant does not grow as fast during this time of year since it doesn't grow as fast as it does during the summer.
Monstera plants should not be ted in the Winter because it is generally not the best season. It is best to wait until mid- to late-winter if you have to, but if you have to, wait until then.
Plants of the Monstera genus can be propagated in two different ways.
By Taking Cuttings
The process of taking cuttings is easy. A small portion of the plant's stem will need to be cut off from the main plant and placed in a container or glass of water.
A new Monstera plant can grow from the nodes along the stem after being given enough time, creating a new growth of roots and leaves.
The Air Layering Process
As this method of root growth is done before cutting the root off the main plant, air layering is a great way of growing new roots from a node. The supplies you will need for this project are a handful of damp sphagnum moss, a tiny bit of twine, and some plastic sheets.
To encourage new roots to grow around the Monstera stem, you should tie a piece of sphagnum moss around the stem where you would like them to grow.
To keep the moisture in the moss, wrap it in plastic wrap and poke holes in it for air to flow through the moss.
Once you see the sphagnum moss growing roots, bring out plastic wrap and twine and remove them when the roots start to grow. After cutting the stem below the new roots, place the new Monstera plant in its pot.
Repotting Monstera with Aerial Roots
Keeping your monstera aerial roots allows you to repot them more easily; however, it makes repotting more challenging if you train them to grow support such as a trellis or moss pole.

To care for your monstera, you will have to repot it every year, so at some point, you will have to deal with this issue.
Here are our tips for repotting monstera with aerial roots.
The most important thing to remember when repotting is to keep the whole thing together if you have support.
It is important to try and unpot the plant safely. It is important to tip the pot on its side and arranges the roots, leaves, and support so that no part of the plant gets squished or broken when the roots are removed.
Repotting Root Bound Monstera
Can Monsters withstand root binding? The answer is no. Monstera can thrive when tightly packed in their pots, but they need water and soil to grow. As a result, Monstera pot plants are usually repotted every two years to prevent self-harm.
Even though monstrosities thrive in any pot size, it's important to recognize when they are potted. It is important to keep an eye on your Monstera and decide if it needs to be transplanted to new pot or not.
Repotting Philodendron Roots Growing Out of the Pot.
A philodendron makes a wonderful houseplant because it's uncomplicated and can live in the same pot for decades. The roots of your plants do not like being root bound, so repotting them frequently will help them grow healthy new roots.
Philodendron Signs
If the roots of Philodendrons in pots are poking out in the base, or the leaf tips are prematurely brown, they are overdue in pots.
Plants should be replanted in the spring. Plants should be watered the day before they are replanted. Reporting will be easier, and stress on the plant will be minimized.
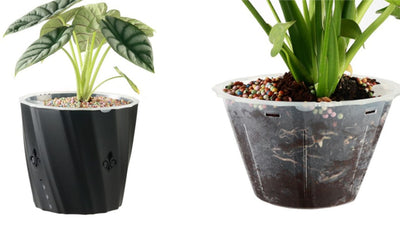
The Best Pot for the Monster Self-Watering Planter
A self-watering Monstera pot is the best option for this type of planter because it allows for easy drainage. There are several different types of pots that can be used for Monstera repotting.

But we recommend using a self-watering planter with drainage holes. The drainage holes should be about 1/4" in diameter and located on the bottom of the pot. This will allow excess water to run out of your planter without worrying about it pooling up at the bottom.
Read More:
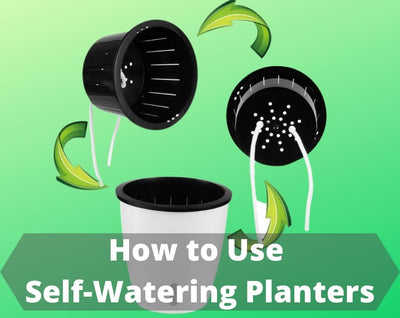
How to Use Self-Watering Planters
Hydroponics vs Soil: Which is Better for Indoor Plants
Summary
In conclusion, repotting Monstera Deliciosa is an ordeal that might leave scars on your hands. But the result will be a happy and fruit-bearing plant whose flowers will brighten your home or garden.
The best part is that you can use a lot of ways to choose your pot.
Remember, don't overwater the plant or risk root rot; don't skip the repotting process altogether, or you could cause the plant to become too root bound.
FAQs
When should you repot Monstera?
Any time of the year is a good time to repot your monstera, so use all-purpose potting soil. However, you should avoid the winter months if possible.
What is the best way to repot Monstera?
There are two ways to repot your Monstera:
Cutting off the old plant and putting in a new one, or removing the old one and adding a layer of soil to its base.
What soil should I repot my Monstera in?
If you are going to use potting soil, choose one that is good quality and has peat moss that can drain well. If you use potting soils with bark or compost in your pots, the plants will not do well because of the lack of nutrient-rich soil.


Leave a comment